
- Beads
- Charms & Pendants
- Christmas
- DIY Kits
- Friendship Bracelet Supplies
- Halloween
- Jewellery Findings
- Tools & Supplies
- Sale Clearance Items
- Yogi Collection
Learn Soutache : Step-by-step Tutourial
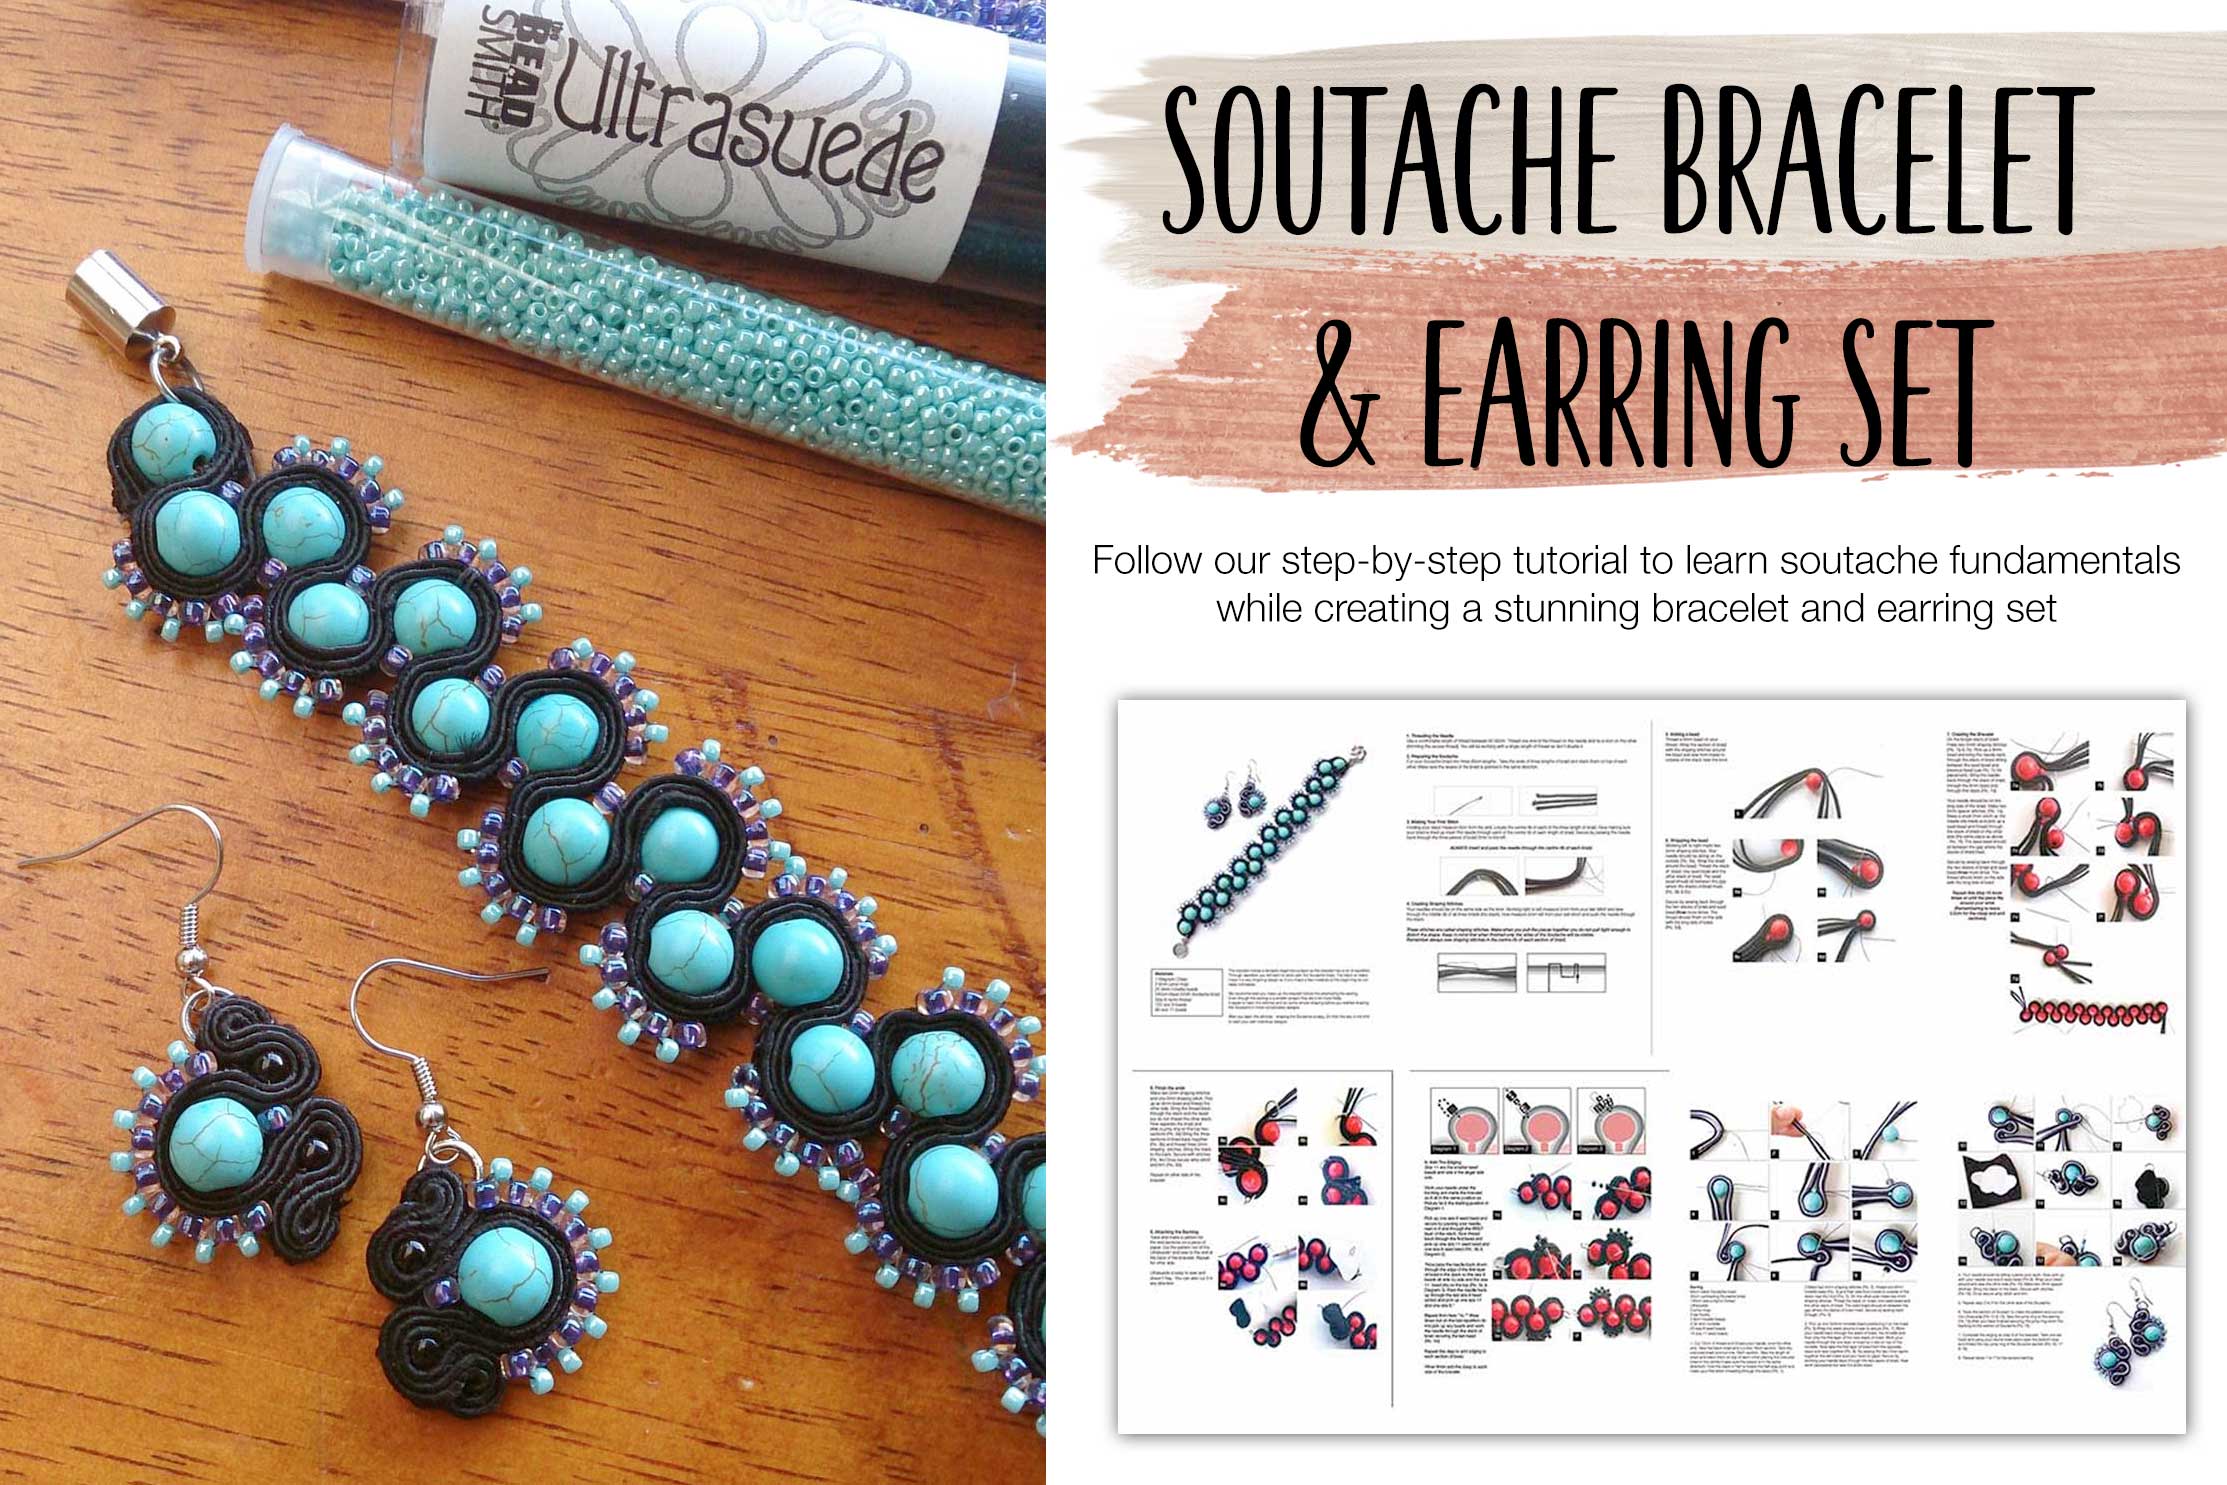
This is a copy of the tutorial that was in our best selling Learn Soutache Beading Kit – It was written for someone new to Soutache with the goal that you will learn the new technique by creating a bracelet and earring set. Even though we don’t sell the kit any more the supplies are easy to find. Enjoy!

The bracelet makes a fantastic beginners project as the bracelet has a lot of repetition. Through repetition you will learn to work with the Soutache braid. The black on black makes it a very forgiving design so if you make a few mistakes at the beginning its not really noticeable.
We recommended you make up the bracelet before the attempting the earring.
Even though the earring is a smaller project they are a lot more fiddly.
After you learn the stitches – shaping the Soutache is easy, then the sky is the limit to start your own individual designs.
Bracelet
1 Magnetic Clasp
2 6mm jump rings
22 8mm Howlite beads
240cm Bead Smith Soutache braid
Size B nymo thread
120 size 8 beads
80 size 11 beads
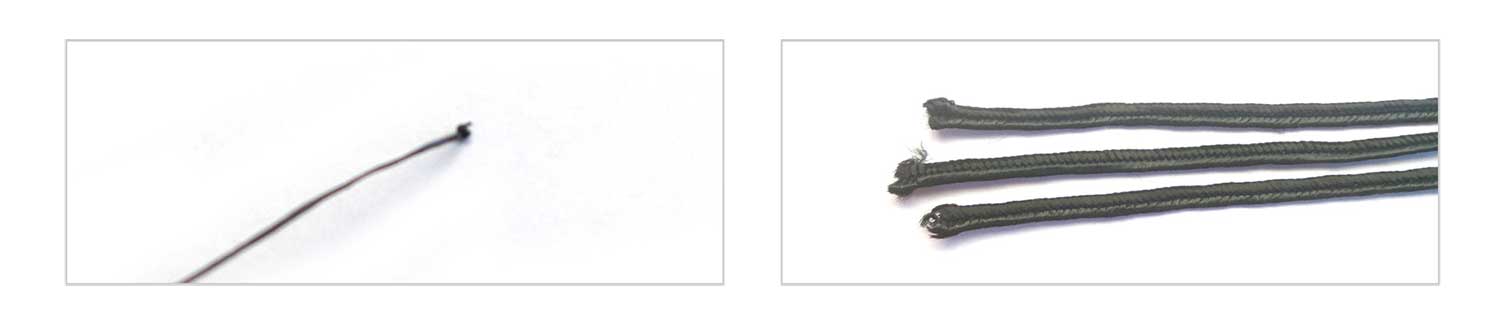
1. Threading the Needle
Use a comfortable length of thread between 60-80cm. Thread one end of the thread on the needle and tie a knot on the other (trimming the excess thread). You will be working with a single length of thread so don’t double it.
When you run out of thread hide the knot of the thread under the braid.
2. Preparing the Soutache
Cut your Soutache braid into three 80cm lengths. Take the ends of three lengths of braid and stack them on top of each other. Make sure the weave of the braid is pointed in the same direction.
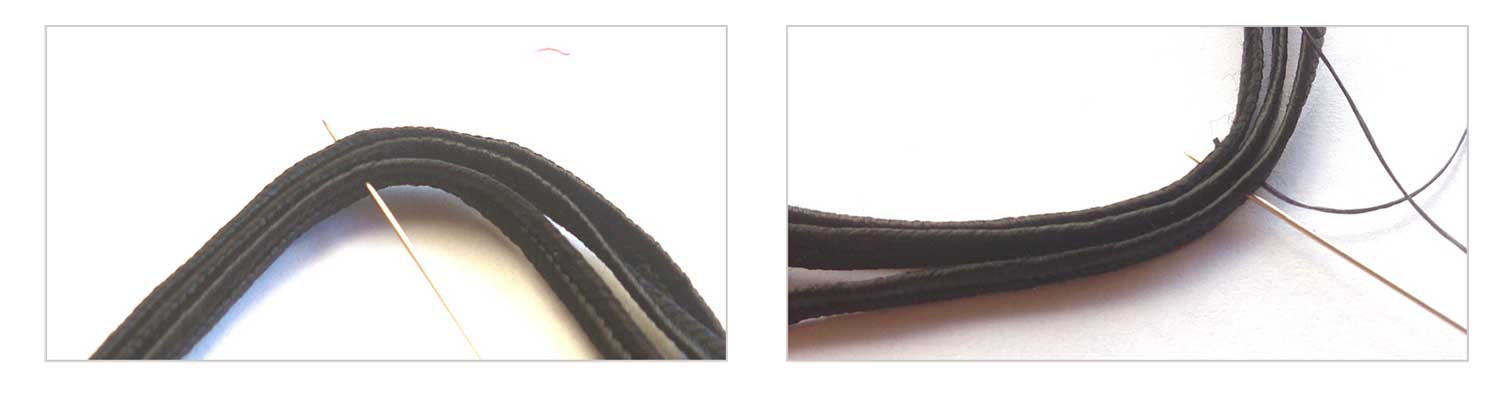
3. Making Your First Stitch
Holding your stack measure 6cm from the end. Locate the centre rib of each of the three length of braid. Now making sure your braid is lined up insert the needle through each of the centre ribs on each length of braid. Secure by passing the needle back through the three pieces of braid 2mm to the left.
ALWAYS insert and pass the needle through the centre rib of each braid.
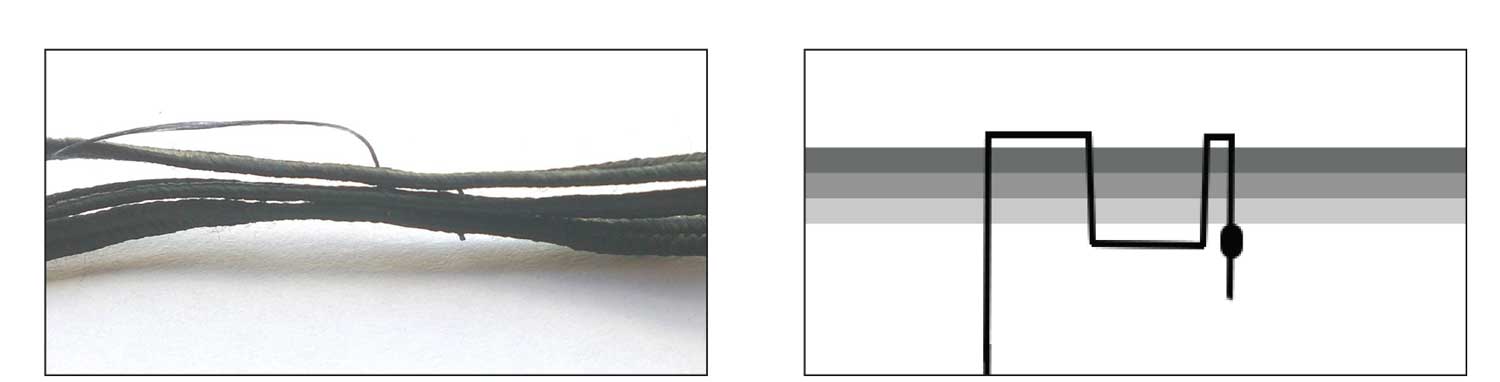
4. Creating Shaping Stitches.
Your needles should be on the same side as the knot. Working right to left measure 5mm from your last stitch and sew through the middle rib of all three braids (the stack), now measure 5mm left from your last stitch and push the needle through the stack.
These stitches are called shaping stitches. Make when you pull the pieces together you do not pull tight enough to distort the shape. Keep in mind that when finished only the sides of the Soutache will be visible. Remember always sew shaping stitches in the centre rib of each section of braid.
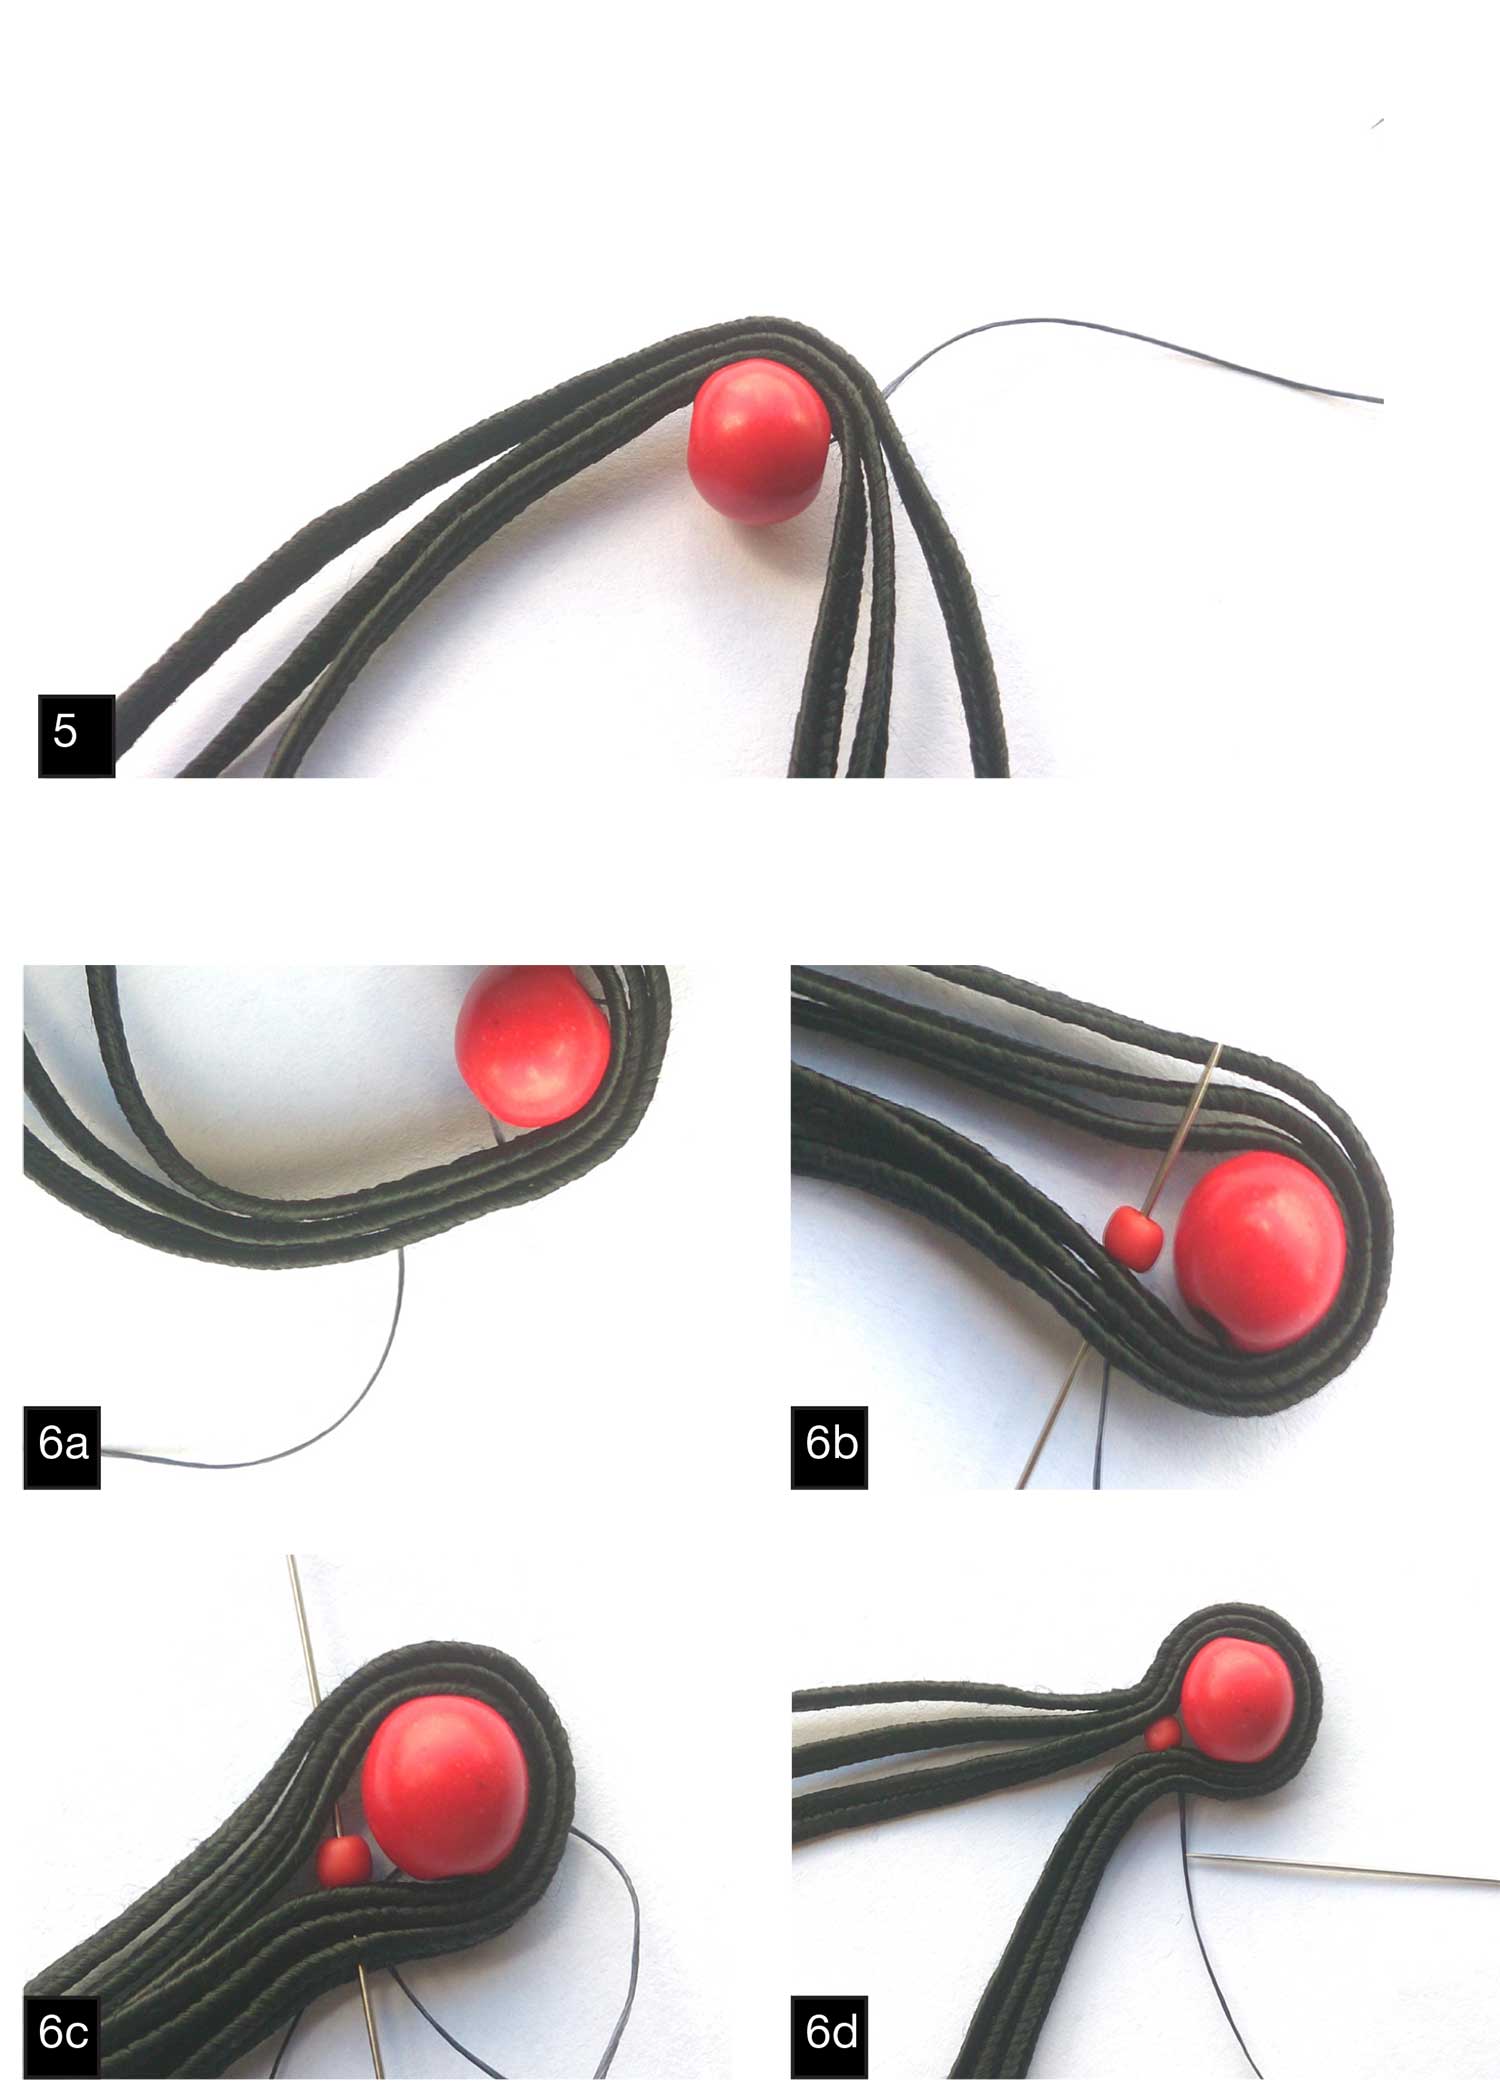
5. Adding a bead
Thread a 8mm bead on your thread. Wrap the section of braid with the shaping stitches around the bead and sew from inside to outside of the stack near the knot.
6. Wrapping the bead
Working left to right make two 5mm shaping stitches. Your needle should be sitting on the outside (Pic. 6a). Wrap the braid around the bead. Thread the stack of braid, one seed bead and the other stack of braid. The seed bead should sit between the gap where the stacks of braid meet. (Pic. 6b & 6c).
Secure by sewing back through the two stacks of braid and seed bead three more times. The thread should finish on the side with the long tails of braid
(Pic. 6d).
7. Creating the Bracelet
On the longer stack of braid make two 5mm shaping stitches (Pic. 7a & 7b). Pick up a 8mm bead and bring the needle back through the stack of braid sitting between the seed bead and previous bead (use Pic. 7c for placement). Bring the needle back through the stack of braid, through the 8mm bead and through first stack (Pic. 7d).
Your needle should be on the long side of the braid. Make two 5mm spacer stitches. (Pic. 7e) Make a small 2mm stitch so the needle sits inside and pick up a seed bead and thread through the stack of braid on the other side (the same place as above – Pic. 7f). The seed bead should sit between the gap where the stacks of braid meet.
Secure by sewing back through the two stacks of braid and seed bead three more times. The thread should finish on the side with the long tails of braid
Repeat this step 18 more times or until the piece fits around your wrist
(Remembering to leave 4.5cm for the clasp and end sections)

 Instagram
 TikTok
 Facebook
 Pinterest
 Youtube